Fentaniao
文章19
标签13
分类8
使用wsl2搭建基于Tensorflow和Pytorch GPU的深度学习环境

使用wsl2搭建基于Tensorflow和Pytorch GPU的深度学习环境

本文的主要目的是记录在WSL2中搭建使用GPU平台的深度学习框架环境的步骤与过程,包括Pytorch和TensorFlow。

[TOC]

前提

  1. 在Windows11或Windows10 21H2版本中已开启WSL2且安装了Ubuntu or Debian)
  2. 配备NVIDIA显卡

初始化Ubuntu

  1. 输入用户名,密码
  2. 更新包

代码

1
2
3
4
5
6
7
8
9
10
11
username

password

password

sudo apt update

password

sudo apt-get upgrade

安装Python

二选一

安装Anaconda

因为我们是在Linux系统下安装Anaconda,所以选择Linux平台的64位版本

1
wget https://repo.anaconda.com/archive/Anaconda3-2021.05-Linux-x86_64.sh

切换到解压后的目录

bash命令执行.sh文件,开始安装

1
bash Anaconda3-2021.05-Linux-x86_64.sh

安装纯Python

1
sudo apt-get install python3-pip python3-dev

Python 2 与Python 3 的对比

默认情况下,Ubuntu 在安装Python 包时使用Python 2(比如python-pip)。如果你想
使用Python 3,那么应该使用python3 前缀代替python。例如:

1
sudo apt-get install python3-pip python3-dev

使用pip 安装包时要记住,它默认安装的是Python 2 的包。想要安装Python 3 的包,
你应该使用pip3。

1
sudo pip3 install tensorflow-gpu

安装Python 科学套件

  1. 安装BLAS 库(这里安装的是OpenBLAS),确保你可以在CPU 上运行快速的张量运算。
  2. 安装Python 科学套件:Numpy、SciPy 和Matplotlib。无论是否做深度学习,如果想要
    使用Python 进行任意类型的机器学习或科学计算,这一步都是必需的。
  3. 安装HDF5。这个库最初由NASA(美国国家航空航天局)开发,用高效的二进制格式
    来保存数值数据的大文件。它可以让你将Keras 模型快速高效地保存到磁盘。
  4. 安装Graphviz 和pydot-ng,这两个包可以将Keras 模型可视化。它们对运行Keras 并不
    是必需的,所以你可以跳过这一步,在需要时再来安装这些包。
  5. 安装某些代码示例中用到的其他包。

代码

1
2
3
4
5
6
7
8
9
10
11
12
13
sudo apt-get install python3-pip python3-dev -y

sudo apt-get install build-essential cmake git unzip pkg-config libopenblas-dev liblapack-dev -y

sudo apt-get install python3-numpy python3-scipy python3-matplotlib python3-yaml -y

sudo apt-get install libhdf5-dev python3-h5py -y

sudo apt-get install graphviz -y

sudo pip3 install pydot-ng

sudo apt-get install python3-opencv -y

安装显卡驱动

需要针对 WSL 的特殊版本驱动,NVIDIA 官方下载网址

注意此处选择的操作系统是指Windows的版本,而不是WSL中的发行版。

下载后,在 Windows 环境下安装驱动。

安装完驱动后,在 WSL 环境下,通过nvidia-sminvidia-smi -L命令,就可以看到显卡信息了。

image-20220322233504637

image-20220322233417281

image-20220322233352052

安装CUDA

二选一

1.官方的安装指引

https://developer.nvidia.com/cuda-toolkit

image-20220322233618074

执行图上的代码

1
2
wget https://developer.download.nvidia.com/compute/cuda/11.6.1/local_installers/cuda_11.6.1_510.47.03_linux.runsudo
sh cuda_11.6.1_510.47.03_linux.run

2.换源安装cuda-toolkit

1
2
3
4
5
6
7
sudo apt-key adv --fetch-keys http://mirrors.aliyun.com/nvidia-cuda/ubuntu1804/x86_64/7fa2af80.pub

sudo sh -c 'echo "deb http://mirrors.aliyun.com/nvidia-cuda/ubuntu1804/x86_64 /" > /etc/apt/sources.list.d/cuda.list'

sudo apt-get update

sudo apt-get install -y cuda-toolkit-11-0

设置cuda环境变量

在主目录下的~/.bashrc文件添加如下路径:

1
2
sudo su -
vim ~/.bashrc

末尾添加并保存:

1
2
3
export CUDA_HOME=/usr/local/cuda
export PATH=$PATH:$CUDA_HOME/bin
export LD_LIBRARY_PATH=/usr/local/cuda-10.1/lib64${LD_LIBRARY_PATH:+:${LD_LIBRARY_PATH}}

如果提示缺少相应的依赖库,直接执行如下代码自动安装相应的依赖库

1
sudo apt-get install freeglut3-dev build-essential libx11-dev libxmu-dev libxi-dev libgl1-mesa-glx libglu1-mesa libglu1-mesa-dev

安装cuDNN

安装cudnn的时候需要登录Nvidia账号,直接下载:cuDNN Library for Linux (x86)

image-20220322233720767

然后打开终端执行:

1
2
3
tar -zxvf cudnn-10.2-linux-x64-v8.0.4.30.tgz
sudo cp -P cuda/lib64/libcudnn* /usr/local/cuda-11.0/lib64/
sudo cp cuda/include/cudnn.h /usr/local/cuda-11.0/include/

为所有用户设置读取权限:

1
2
sudo chmod a+r /usr/local/cuda-11.0/include/cudnn.h 
sudo chmod a+r /usr/local/cuda-11.0/lib64/libcudnn*

验证cuda是否安装成功

img

img

测试

Keras

安装TensorFlow

① 无论是否支持GPU,都可以使用pip从PyPI 安装TensorFlow。安装不支持GPU 的
TensorFlow 的命令如下。

1
sudo pip3 install  tensorflow

② 安装支持GPU 的TensorFlow 的命令如下。

1
sudo pip3 install tensorflow-gpu

安装Keras

1
sudo pip3 install keras

示例

代码

1
2
3
4
5
6
7
8
9
10
11
12
13
14
15
16
17
18
19
import tensorflow as tf
mnist = tf.keras.datasets.mnist

(x_train, y_train),(x_test, y_test) = mnist.load_data()
x_train, x_test = x_train / 255.0, x_test / 255.0

model = tf.keras.models.Sequential([
tf.keras.layers.Flatten(input_shape=(28, 28)),
tf.keras.layers.Dense(128, activation='relu'),
tf.keras.layers.Dropout(0.2),
tf.keras.layers.Dense(10, activation='softmax')
])

model.compile(optimizer='adam',
loss='sparse_categorical_crossentropy',
metrics=['accuracy'])

model.fit(x_train, y_train, epochs=5)
model.evaluate(x_test, y_test)

输出

输出很长,要花上一段时间,例如在GTX 1660Ti上花了一分钟。这个时候可以借机参考后面的监控GPU利用率的方法来检查显卡调用情况。

示例2

在安装完成后,可以用下列Python语句验证TensorFlow是否可以连接到GPU,注意激活虚拟环境后再运行:

1
2
3
import tensorflow as tf
tf.test.is_gpu_available()
tf.config.list_physical_devices()

输出

1
2
3
4
5
6
7
8
9
10
11
12
13
14
2022-03-22 23:53:58.209067: I tensorflow/stream_executor/cuda/cuda_gpu_executor.cc:922] could not open file to read NUMA node: /sys/bus/pci/devices/0000:02:00.0/numa_node
Your kernel may have been built without NUMA support.
2022-03-22 23:53:58.210941: I tensorflow/stream_executor/cuda/cuda_gpu_executor.cc:922] could not open file to read NUMA node: /sys/bus/pci/devices/0000:02:00.0/numa_node
Your kernel may have been built without NUMA support.
2022-03-22 23:53:58.211774: I tensorflow/stream_executor/cuda/cuda_gpu_executor.cc:922] could not open file to read NUMA node: /sys/bus/pci/devices/0000:02:00.0/numa_node
Your kernel may have been built without NUMA support.
2022-03-22 23:53:58.216025: I tensorflow/stream_executor/cuda/cuda_gpu_executor.cc:922] could not open file to read NUMA node: /sys/bus/pci/devices/0000:02:00.0/numa_node
Your kernel may have been built without NUMA support.
2022-03-22 23:53:58.216161: I tensorflow/core/common_runtime/gpu/gpu_device.cc:1609] Could not identify NUMA node of platform GPU id 0, defaulting to 0. Your kernel may not have been built with NUMA support.
2022-03-22 23:53:58.217104: I tensorflow/stream_executor/cuda/cuda_gpu_executor.cc:922] could not open file to read NUMA node: /sys/bus/pci/devices/0000:02:00.0/numa_node
Your kernel may have been built without NUMA support.
2022-03-22 23:53:58.217737: I tensorflow/core/common_runtime/gpu/gpu_device.cc:1525] Created device /device:GPU:0 with 3954 MB memory: -> device: 0, name: NVIDIA GeForce GTX 1660 Ti with Max-Q Design, pci bus id: 0000:02:00.0, compute capability: 7.5
True
[PhysicalDevice(name='/physical_device:CPU:0', device_type='CPU'), PhysicalDevice(name='/physical_device:GPU:0', device_type='GPU')]

Pytorch

根据对应的CUdA版本安装对应的pytorch 官网:https://pytorch.org/ 下载pytorch

1
pip install torch==1.7.1+cu110 torchvision==0.8.2+cu110 torchaudio===0.7.2 -f https://download.pytorch.org/whl/torch_stable.html

示例1

代码

1
2
3
import torch
x = torch.rand(5,3)
print(x)

输出

1
tensor([[0.9943, 0.2830, 0.5508], [0.0765, 0.6474, 0.0059], [0.7241, 0.1868, 0.5398], [0.3217, 0.4664, 0.4242], [0.3351, 0.2482, 0.7371]])

示例2

代码

1
torch.cuda.is_available()

输出为True即证明支持GPU了。

监控GPU利用率

运行脚本时,可以在另一个shell 窗口中监控GPU利用率。

显卡名称

在其中输入nvidia-smi -L命令,正常情况下应该可以显示出显卡的名称。

输出

1
GPU 0: NVIDIA GeForce GTX 1660 Ti with Max-Q Design (UUID: GPU-aed9c4ba-c9b4-0910-6110-9236d882f851)

瞬时情况

代码

1
NVIDIA-smi

效果

1
2
3
4
5
6
7
8
9
10
11
12
13
14
15
16
17
18
19
20
21
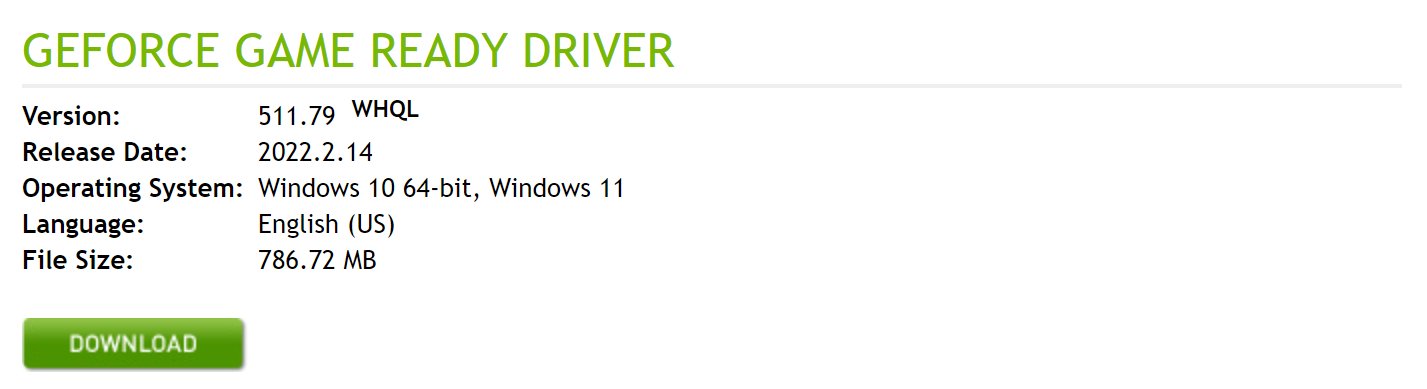
Tue Mar 22 22:38:35 2022
+-----------------------------------------------------------------------------+
| NVIDIA-SMI 510.52 Driver Version: 511.79 CUDA Version: 11.6 |
|-------------------------------+----------------------+----------------------+
| GPU Name Persistence-M| Bus-Id Disp.A | Volatile Uncorr. ECC |
| Fan Temp Perf Pwr:Usage/Cap| Memory-Usage | GPU-Util Compute M. |
| | | MIG M. |
|===============================+======================+======================|
| 0 NVIDIA GeForce ... On | 00000000:02:00.0 Off | N/A |
| 0% 41C P8 6W / N/A | 4412MiB / 6144MiB | 23% Default |
| | | N/A |
+-------------------------------+----------------------+----------------------+

+-----------------------------------------------------------------------------+
| Processes: |
| GPU GI CI PID Type Process name GPU Memory |
| ID ID Usage |
|=============================================================================|
| 0 N/A N/A 2400 C /python3.8 N/A |
| 0 N/A N/A 32447 G /Xwayland N/A |
+-----------------------------------------------------------------------------+

实时情况

代码

1
watch -n 5 NVIDIA-smi -a --display=utilization

效果

1
2
3
4
5
6
7
8
9
10
11
12
13
14
15
16
17
18
19
20
21
22
23
24
25
26
27
28
Every 5.0s: NVIDIA-smi -a --display=utilization                          DESKTOP-C18S314: Tue Mar 22 23:02:48 2022

==============NVSMI LOG==============

Timestamp : Tue Mar 22 23:02:48 2022
Driver Version : 511.79
CUDA Version : 11.6

Attached GPUs : 1
GPU 00000000:02:00.0
Utilization
Gpu : 0 %
Memory : 0 %
Encoder : 0 %
Decoder : 0 %
GPU Utilization Samples
Duration : Unknown Error
Number of Samples : Unknown Error
Max : Unknown Error
Min : Unknown Error
Avg : Unknown Error
Memory Utilization Samples
Duration : Unknown Error
Number of Samples : Unknown Error
Max : Unknown Error
Min : Unknown Error
Avg : Unknown Error
ENC Utilization Samples

报错

官方安装CUDA的方法好像不起效

报错

1
2
# 查看cuda是否安装成功
nvcc -V

报错

1
2
3
4
cd /usr/local/cuda/samples/4_Finance/BlackScholes
sudo make
./BlackScholes
# 好像是11.0可以这样

Reference

本文作者:Fentaniao
本文链接:https://fentaniao.github.io/2022/03/22/wsl2-deep-learning/
版权声明:本文采用 CC BY-NC-SA 3.0 CN 协议进行许可
×